How to Clean Camper After Mice Infestation Without Getting Sick
A camper in storage over the winter, when mice are likely to nest and breed, can be a prime target for a mouse infestation. Infestations not only leave an unsightly mess throughout the camper but also make it a prime hotspot for spreading diseases like hantavirus. So how do you clean a camper after mice infestation?
Cleaning a camper after a mice infestation requires using a combination of gloves, paper towels, bleach solution, and a garbage bag. Do not use a vacuum cleaner to clean mouse droppings because it causes viral particles to be scattered in the RV air system.
Steps To Clean Up After Mice in Camper
What do mice leave behind? Apart from droppings, urine, and nesting material, or even nests themselves, they may leave traces of disease.
The dangerous hantavirus, for example, causes hantavirus pulmonary syndrome (HPS), which is characterized by fever, headache, and nausea in its early stages and lungs filled with fluid in its late stages.
Do all mice carry the hantavirus?
Not really.
Particular types of mice, such as the deer mouse found in the western and central US and Canada, are carriers of the disease. White-footed mice in the Northeast also carry it.
However, it is wise to clean up after mice infestations in campers, in any case, because they may carry other illnesses.
Cleaning up after mice in any setting, as the Centers for Disease Control and Prevention recommends, is primarily a matter of protecting yourself from catching this and other mouse-borne illnesses.
That is why there is a huge emphasis here on protecting yourself and disinfecting your surroundings to prevent infection.
Some questions I often get asked is, does alcohol kill the hantavirus or does white vinegar kill the hantavirus?
I will come back to this later, but for now, I recommend that using disinfectant or a bleach solution is the best way to get rid of possible hantavirus infection.
This is something the CDC recommends as well.
Wear Protective Equipment Per CDC Recommendations
Cleaning up after mice in a camper requires special care.
I mentioned that some mice can carry the hantavirus, but most mice can carry possible infectious diseases and bacteria.
That is why the first step is putting on protective gear. Protective gear means wearing a mask, a long-sleeved shirt, gloves, and boots.
Gloves and a mask are basic safety equipment I recommend for cleaning up mice debris.
Not only do they protect you from inhaling the air around mice remains, but they also protect you when using household bleach or disinfectant to clean and disinfect affected areas.
In some serious infestations, the CDC recommends wearing a respirator.
Another thing I recommend is wearing a long-sleeved shirt and boots. Long-sleeved shirts protect you from getting mice remains like droppings and urine all over your arms.
Boots protect your legs as well, especially if you are not wearing pants in warmer climates. The good thing is, once you wear them, you can take them off and disinfect them easily.
Prepare Solution With 1 Part Bleach and 9 Water
I have received queries about whether common home remedies like white vinegar or alcohol work in removing the hantavirus from surfaces.
White vinegar is a good cleaning product, yes, but it is not a disinfectant, meaning that it cannot kill dangerous bacteria or viruses.
Alcohol solutions such as ethyl or isopropyl-based ones are more effective.
However, when cleaning your trailer, I recommend using either a bleach solution or a household disinfectant.
This reduces the risk of catching any bacteria or viral material from what mice leave behind. Moreover, it can clean a camper or RV from traces of other illnesses, whether they are mouse-borne or otherwise.
How do you make a bleach solution?
Take one part of common household bleach and mix it with nine parts of water.
Common household disinfectants should be prepared according to package instructions, especially since manufacturers want to be sure that you are using the disinfectant to the desired effect.
Pour your bleach solution or prepared household disinfectant into a spray bottle, such as the ones you use to water household plants with mist.
Remember to be especially careful with household disinfectants, especially since they can emit fumes and harm your skin.
Wear gloves when handling disinfectant products!
Use The Solution on What Mice Leave Behind

The next step is to go around your camper or RV’s interior or any other compartment, looking for traces of what mice leave behind.
They basically leave behind droppings or urine.
Mice droppings are small, black, and soft when freshly laid, and turn brown and hard the longer they last. You can tell how long an infestation has lasted with that.
When you find a pile of droppings or traces of mice urine, which often emit an ammonia-like stale smell, get your spray bottle and spray the affected area immediately with your disinfectant or bleach mixture.
This kills off any bacteria, germs, or viruses that may be found in the scattered droppings or traces of urine.
Look around the engine compartment, tool compartments, passenger areas, and even ducting and air filtration areas for any traces of mice infestation.
A thorough search can reveal that mice have been everywhere in your camper or RV and that they have been likely to leave their stuff behind.
Once you find and disinfect those remains, go to the next step.
Remove Droppings and Clean Mouse Traces
Now that you have disinfected the droppings and urine, it is time to remove the remains mice leave behind.
This step is pretty simple but crucial. It requires patience, time, and a bit of courage.
You will have to physically pick up the droppings and dispose of them in a plastic garbage bag. Don’t worry, you have gloves on.
The question most people ask is if there is a quicker way to do that.
Can you use a broom or even your vacuum cleaner or a high-pressure water spray to remove the droppings?
I strongly discourage using any of these methods. The risk is that, especially with a broom or a vacuum cleaner, you can send particles of bacteria or viral material into the air.
The best way to remove mouse droppings is to take a roll of household paper towels with you.
Tear off a piece and retrieve as many mouse droppings as you can. Place them immediately into a plastic garbage bag.
When the bag is reasonably full, spray the interior of the bag with a disinfecting solution. Seal the bag and take it to the garbage.
It is recommended also if you notice that any part of your house has traces of mice activity, you should take steps to clean the affected area.
This is true of your RV as well. If you see, for instance, mouse tracks or spots, it might be best to scrub any surfaces with detergent after disinfecting them, of course.
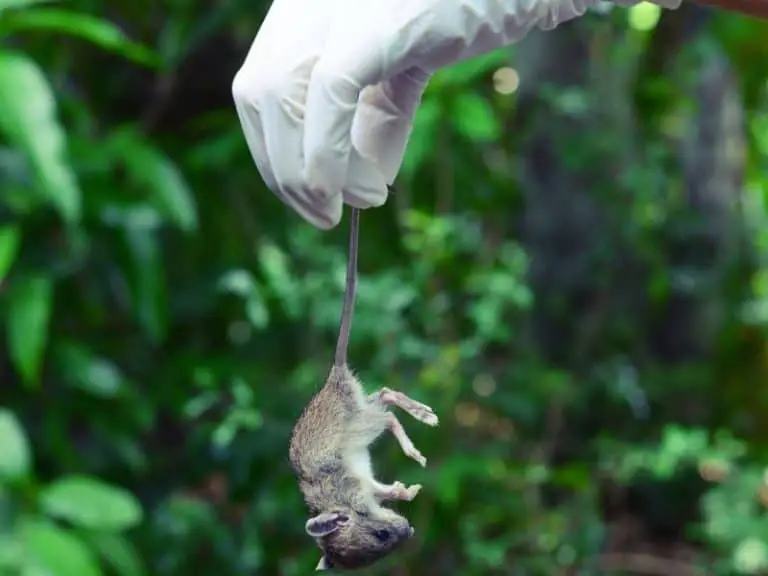
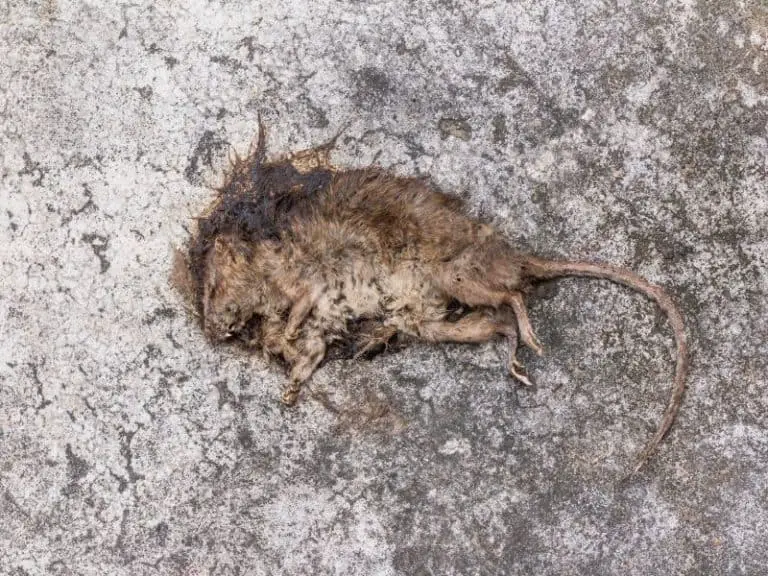
Remove Any Dead Mice Bodies
What happens after a mouse infestation, especially if it took a while?
You may happen to find some dead mice in your camper. It is easy to tell if there is one.
If your camper happens to be smelling of rotting flesh inside, chances are there will be a dead mouse or two in the area. Remove them immediately as part of your camper cleaning.
Wearing gloves, carefully disinfect the corpse by spraying it (and the surrounding area) with the disinfectant solution, and soak it in the solution and leave for five minutes.
Take the dead mouse with a paper towel, wrap it in a towel, place it in a garbage bag, seal the bag, and place it inside another bag. Dispose of immediately.
If there is more than one corpse, it is best to use one bag for this operation. As a precaution, make a note to clean this spot up in a later step.
Don’t forget to remove your gloves, dispose of the gloves, wash your hands with soap and water thoroughly. The RV sink is the best place to wash your hands after getting rid of a mouse corpse.
Remove Nests and Nesting Material, If Found
The next step is to look for nests, which can be in certain places in your camper that are out of the way.
Mice love to make nests in secluded spots. To identify a nest, look for a round object, often made out of paper or other material, that is around six to eight inches in diameter.
The surrounding area will inevitably have plenty of mice droppings and other nesting material.
The CDC recommends looking in certain places for nests and nesting material.
For example, engine compartments are vulnerable spots, including insulation (which is a useful material for nests). You can also look in and under seats, beneath bunks, in compartments or closets within your camper, and other isolated spots.
Again, the first step is to disinfect the nest and the surrounding area with the disinfectant.
Soak the nest with the solution and leave for five minutes. Then, using a paper towel, take the nest and place it in a garbage bag.
Take any droppings as well and place it in the bag. Spray the interior of the bag, seal it, and place it in another bag. Dispose of immediately.
As with removing mouse corpses, the next thing to do is to clean up after yourself. Wash your gloved hands, remove your gloves, throw them away, and wash your hands with soap and water.
If you do not have soap and water nearby, which is not likely given that campers and RVs have sinks, use an alcohol-based solution with at least 80% alcohol.
Disinfect the Vehicle Again and Clean It Up
You’re almost there!
Now that you’ve gotten rid of mice droppings, nests, and mouse corpses (if any), your goal with this step is to make sure that the vehicle is clean and free of anything that will potentially cause infection.
The first thing you have to do before doing any cleaning is to ventilate your RV.
Next, spray the interior of the camper and any compartments where you’ve found dead mice, nests, nesting material, or droppings with disinfectant.
Pay special attention to areas that show signs of a heavy mouse infestation. This requires thorough disinfection. This step will kill off any remaining bacteria or viruses, including the hantavirus.
The next step is to clean up your camper. Scrub any surfaces like countertops or cabinet interiors that have traces of mice activity.
Launder any linens and air any mattresses where you see minor signs of mice damage or dispose of them. Steam clean or shampoo any carpets or floors especially if you see traces of mice activity.
Don’t forget to dispose of any food containers and boxes that have signs of mouse activity.
Food containers that are torn open, with the food spilling out, may have traces of food-borne bacteria left by mice.
It is best that you use this opportunity to get rid as well of food crumbs, which are attractive to mice if left behind.
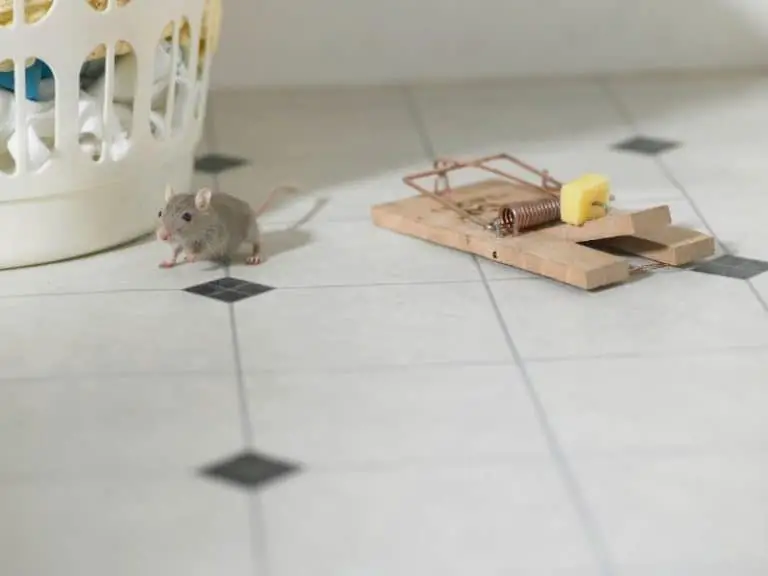
Prevent Mice From Entering Your Vehicle
This step is very important. If you do not take steps to prevent mice from infesting your camper, chances are that it will happen again.
It is possible that mice will return, because there are ways they can enter your vehicle, such as ducts or spaces with wires that lead inside. However, you can prevent them from causing further harm.
The first thing to do is to lay out traps. Place traps in areas along walls where mice normally scurry about. Snap traps are the most useful for this purpose, as are sticky traps.
Baiting these traps is the only bit of food I would recommend leaving inside your RV or camper without being stored elsewhere.
The other thing I recommend is to use chemical bait stations. These will tempt mice, who eat roughly 20 to 30 times a day, to take the bait and eventually die of some form of poisoning.
Lay these bait stations in spaces where you know mice will nest. However, keep them out of the reach of children or pets.
Finally, make sure not to leave any exposed food in your RV or camper. If you choose to leave food inside your vehicle, keep it in a sealed rodent-proof plastic container.
This is especially for food that comes in paper bags. Since most RVs have an icebox or fridge, it is an ideal place to store food that needs to be kept cold.
Materials Needed in Cleaning Up After Mice in Camper

The following is a list of materials you will need to clean up after a mice infestation and to prevent it from happening again.
These materials are readily available online, but are also available at your local hardware store, pest control supplier, or supermarket, depending on what you need.
Note that I did not list some useful materials to use when cleaning up, especially those used for cleaning up after yourself. This includes soap and hand sanitizer.
I also did not mention items of clothing, such as rubber boots and long-sleeved shirts, which you may want to use.
Remember, having the right materials will help you clean up well and prevent mice from further causing damage to your camper. When you’re shopping for these materials, keep this list in mind.
I hope that this will be useful for your cleaning purposes.
Gloves
There are two kinds of gloves I recommend: rubber household gloves and disposable latex gloves. Both can be used in the clean-up operation when needed.
They are both easy to dispose of after use, and they will be able to provide needed protection for your hands and lower arms when cleaning after mice.
Rubber household gloves such as these often come in packs of ten and different sizes depending on your hands.
The advantage of this particular kind of glove is that they have long sleeves, which will protect your upper arm along with long-sleeved shirts. These gloves require airing out after removing from the package to prevent a rubbery smell.
Disposable latex gloves such as these come in boxes of 50 or more. These are very useful for cleaning after your mouse infestation because you can easily dispose of them after use.
This particular brand of latex gloves has long cuffs which, like the rubber household gloves I talked about, will offer greater protection for your arm.
Especially when cleaning up traces of mouse activity, remember to wash and dispose of these gloves.
This is why I recommend buying them in packs of 10 or more so that you have enough at hand for some of the cleaning steps I recommend.
Masks
Masks are a vital accessory for cleaning up infectious waste such as mice droppings and protecting against fumes emitted by some household disinfectants.
A good mask should be comfortable and breathable while protecting you from inhaling viral or bacterial material from what mice leave behind.
Disposable masks such as these have a three-layer protective barrier that will prevent dust and other particles from being breathed in. They come with adjustable ear bands for a snug, comfortable fit.
The masks come in packs of 50 and are available in bulk in larger quantities. This is important if you’re using them for more than one cleaning session.
KN95 masks are the gold standard for protecting yourself from inhaling bacterial or viral material.
For that reason, they are often used by medical personnel in hospitals or clinics to prevent the risk of catching an infectious disease.
However, their cost is much higher per unit than the disposable masks above.
Respirators
Major mice infestations in campers pose a higher risk to those who are cleaning them. Experts highly recommend the use of protective gear for those types of situations.
Masks like those shown above are good to an extent, but the risk of catching potentially infectious particles is higher when dealing with a lot of mice deposits.
That is why industrial respirators such as this one come in handy. The respirator which I linked to is lightweight, durable, and reusable. It can be cleaned and disassembled for future use.
However, the key is to find the right filters and cartridges to attach to the respirator. These will help protect the user from particulate matter in the air.
This HEPA filter attachment is one example of the kind of filter that is useful when dealing with a heavy mouse infestation in your camper.
Follow manufacturer instructions on how to attach filters to cartridges for effective use. Of course, if you need help in these situations, consult a professional pest control specialist.
Bleach and Household Disinfectant
While vinegar is not quite a good disinfectant—it is a cleaning agent—and alcohol is helpful in some situations, you should aim to use the best possible solution when cleaning up after mice.
What disinfectant kills the hantavirus?
The disinfectant experts recommend is common household bleach. Commercial disinfectants are an alternative.
Pure brand common household bleach is one possible alternative.
Whatever brand you use, the formula for mixing them with water is the same. Use one part bleach to nine parts water. This can be applied to mice nests, droppings, or any area where mice have scurried about.
If you are looking for a commercial disinfectant solution, look for one that can specifically kill off the hantavirus.
Most of the ones on the market I am aware of promise to kill 99.9% of germs, which can potentially make them effective.
Prepare the solution according to the manufacturer’s instructions, and take note of safety precautions.
Another question I’ve encountered is whether hydrogen peroxide kills the hantavirus.
A 3% hydrogen peroxide mixture works as a disinfectant and stops viruses and other microorganisms.
If a bleach solution is too strong that it may harm your floors, this solution may also work. However, in most cases, bleach will work.
Spray Bottles
Once you have your disinfecting solution, where would you place it? One very affordable item you might want to invest in is plastic spray bottles.
They serve many uses around the home, from watering plants to grooming hair. The use I want to emphasize here, though, is for household cleaning. Your bleach mixture or prepared disinfectant goes here.
One feature of these spray bottles you may want to note is that the nozzles can be adjusted according to what you want to do. One mode is to keep it shut.
Another is to spray a fine mist, which might be useful when disinfecting the camper passenger compartment. The setting you might want to consider using is the targeted spray.
A targeted spray is very useful for disinfecting smaller areas and things such as mice nests, droppings, and urine spots.
This can be used to soak nests and corpses before leaving them for five minutes to disinfect.
As a precaution, empty and rinse out spray bottles after use to prevent their misuse by others, which can be harmful.
Waste Disposal Bags
Keeping a good supply of waste disposal bags, or garbage bags, is always essential around the home for cleanliness.
When cleaning out something like a camper trailer after a mouse infestation, these are very essential, as one may need to put collected rat droppings, nests, and nesting material in them.
If you are dealing with a more serious infestation, the thing to do is not to use ordinary household bags or bags used for compost collection (green bags).
Use small bags meant for biohazardous waste. These often are in red and have a warning label on them indicating that the waste is infectious. Dispose of them according to local regulations.
Using garbage bags for mice infestation cleanup in campers requires that you use at least two at a time.
One is to place the mouse droppings, nesting materials, or any other mouse remains.
The other is to place the other bag in to prevent the first bag from leaking out anything infectious. Dispose of the bags as soon as you can.
Paper Towels
It is not a good idea to use your bare hands, or for that matter bare gloves, to pick up any mouse waste. The CDC recommends using paper towels for this task.
It is easy to see why.
They are easily disposable, they protect your gloves from touching the material you need to pick up, and they can also help clean surfaces along with disinfectant.
You might want to consider getting paper towels that are somewhat thick so that you can easily pick up mice droppings, for example, without the towel tearing up and inadvertently exposing the material.
Disposal is easy. Just put them in the garbage bag with the material you’ve collected, and double bag it.
You may also need to place paper towels used to clean infected areas with a disinfectant in those bags as well.
Remember, take extra care when handling paper towels exposed to mice droppings, nests, or corpses, or anything similar.
Cleaning up after mice infestations in your RV requires the best possible materials and the steps needed to make the cleanup happen.
One last piece of advice: don’t panic, keep calm, and keep on cleaning.
Photo credit: ©canva.com/duallogic, ©canva.com/elenaellisseeva
Medical Disclaimer: TheHomePestControl is a digital publisher and does not offer personal health or medical advice. The contents of this website are not intended to substitute for professional medical advice, diagnosis, or treatment.
Affiliate Disclaimer: As an Amazon Associate, I earn from qualifying purchases made on our website. If you make a purchase through links from this website, I may earn a commission at no additional cost to you.